Github: ExplosionField 分析版本:3122cb6
一个粒子爆炸效果的 UI 开源控件。
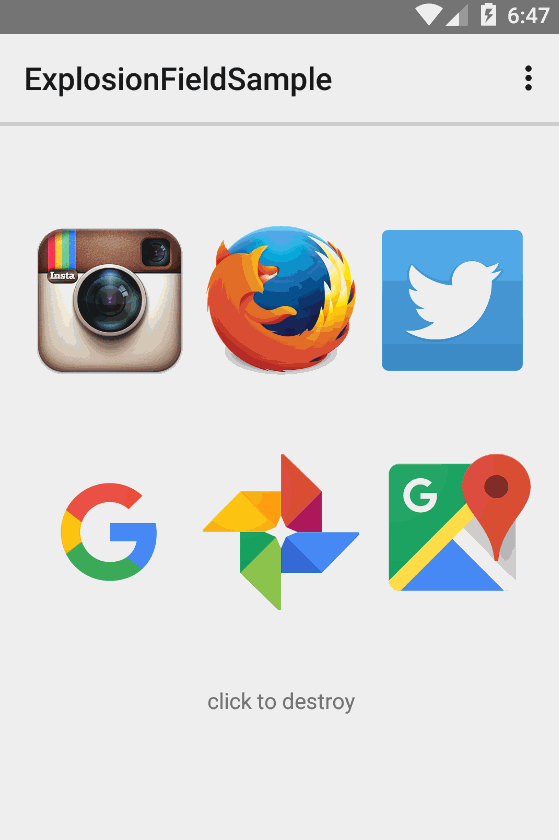
ExplosionField
ExplosionField 是一个开源的 Android UI 控件,其 UI 效果是粒子爆炸效果。
使用
得到想要爆炸的 View ,然后将 View 设置到 ExplosionField 中:
1
2
| ExplosionField explosionField = ExplosionField.attach2Window(this);
explosionField.explode(view);
|
源码解析
从 MainActivity 开始分析走吧:
1
2
3
4
5
6
7
8
9
10
11
12
13
14
15
16
17
18
19
20
21
22
23
24
25
26
27
28
29
30
| public class MainActivity extends Activity {
@Override
protected void onCreate(Bundle savedInstanceState) {
super.onCreate(savedInstanceState);
setContentView(R.layout.activity_main);
mExplosionField = ExplosionField.attach2Window(this);
addListener(findViewById(R.id.root));
}
private void addListener(View root) {
if (root instanceof ViewGroup) {
ViewGroup parent = (ViewGroup) root;
for (int i = 0; i < parent.getChildCount(); i++) {
addListener(parent.getChildAt(i));
}
} else {
root.setClickable(true);
root.setOnClickListener(new View.OnClickListener() {
@Override
public void onClick(View v) {
mExplosionField.explode(v);
v.setOnClickListener(null);
}
});
}
}
}
|
从 MainActivity 中可以看出爆炸这个过程是调用 explode(View) 方法进行的,同时得到 ExplosionField 对象是通过其静态方法 ExplosionField.attach2Window(Activity) 得到的。
那么 attach2Window(Activity) 做了什么呢:
1
2
3
4
5
6
7
8
9
10
11
12
| public class ExplosionField extends View {
public static ExplosionField attach2Window(Activity activity) {
ViewGroup rootView = (ViewGroup) activity.findViewById(Window.ID_ANDROID_CONTENT);
ExplosionField explosionField = new ExplosionField(activity);
rootView.addView(explosionField, new ViewGroup.LayoutParams(
ViewGroup.LayoutParams.MATCH_PARENT, ViewGroup.LayoutParams.MATCH_PARENT));
return explosionField;
}
}
|
attach2Window(Activity) 方法就是将 ExplosionField 添加到最上层。那么来看看这个 View :
1
2
3
4
5
6
7
8
9
10
11
12
13
14
15
16
17
18
19
20
21
22
23
24
25
26
27
28
29
30
31
32
33
34
35
36
37
38
39
40
41
42
43
44
45
46
47
48
49
50
51
52
53
54
55
56
57
58
59
60
61
62
63
64
65
66
67
68
69
70
71
72
73
74
75
76
77
78
79
80
81
82
83
84
85
| public class ExplosionField extends View {
private int[] mExpandInset = new int[2];
private List<ExplosionAnimator> mExplosions = new ArrayList<>();
public ExplosionField(Context context) {
super(context);
init();
}
public ExplosionField(Context context, AttributeSet attrs) {
super(context, attrs);
init();
}
public ExplosionField(Context context, AttributeSet attrs, int defStyleAttr) {
super(context, attrs, defStyleAttr);
init();
}
private void init() {
Arrays.fill(mExpandInset, Utils.dp2Px(32));
}
@Override
protected void onDraw(Canvas canvas) {
super.onDraw(canvas);
for (ExplosionAnimator explosion : mExplosions) {
explosion.draw(canvas);
}
}
public void explode(final View view) {
Rect r = new Rect();
view.getGlobalVisibleRect(r);
int[] location = new int[2];
getLocationOnScreen(location);
r.offset(-location[0], -location[1]);
r.inset(-mExpandInset[0], -mExpandInset[1]);
int startDelay = 100;
ValueAnimator animator = ValueAnimator.ofFloat(0f, 1f).setDuration(150);
animator.addUpdateListener(new ValueAnimator.AnimatorUpdateListener() {
Random random = new Random();
@Override
public void onAnimationUpdate(ValueAnimator animation) {
view.setTranslationX((random.nextFloat() - 0.5f) * view.getWidth() * 0.05f);
view.setTranslationY((random.nextFloat() - 0.5f) * view.getHeight() * 0.05f);
}
});
animator.start();
view.animate().setDuration(150).setStartDelay(startDelay).scaleX(0f).scaleY(0f).alpha(0f).start();
explode(Utils.createBitmapFromView(view), r, startDelay, ExplosionAnimator.DEFAULT_DURATION);
}
public void explode(Bitmap bitmap, Rect bound, long startDelay, long duration) {
final ExplosionAnimator explosion = new ExplosionAnimator(this, bitmap, bound);
explosion.addListener(new AnimatorListenerAdapter() {
@Override
public void onAnimationEnd(Animator animation) {
mExplosions.remove(animation);
}
});
explosion.setStartDelay(startDelay);
explosion.setDuration(duration);
mExplosions.add(explosion);
explosion.start();
}
}
|
当开始进行爆照时,先进行 150ms 的振动动画,之后将此 View 隐藏掉,在 ExplosionField 中的相同位置绘制出这个 View ,进行爆炸。
先简单的过一遍 Utils 这个类吧:
1
2
3
4
5
6
7
8
9
10
11
12
13
14
15
16
17
18
19
20
21
22
23
24
25
26
27
28
29
30
31
32
33
34
35
36
37
38
39
40
41
42
43
44
45
46
47
48
49
50
51
52
53
54
55
56
57
58
59
60
61
62
| public class Utils {
private Utils() {
}
private static final float DENSITY = Resources.getSystem().getDisplayMetrics().density;
private static final Canvas sCanvas = new Canvas();
public static int dp2Px(int dp) {
return Math.round(dp * DENSITY);
}
* 将一个View绘制成Bitmap
*
* @param view
* @return
*/
public static Bitmap createBitmapFromView(View view) {
if (view instanceof ImageView) {
Drawable drawable = ((ImageView) view).getDrawable();
if (drawable != null && drawable instanceof BitmapDrawable) {
return ((BitmapDrawable) drawable).getBitmap();
}
}
view.clearFocus();
Bitmap bitmap = createBitmapSafely(view.getWidth(),
view.getHeight(), Bitmap.Config.ARGB_8888, 1);
if (bitmap != null) {
synchronized (sCanvas) {
Canvas canvas = sCanvas;
canvas.setBitmap(bitmap);
view.draw(canvas);
canvas.setBitmap(null);
}
}
return bitmap;
}
* 创建bitmap,防OOM
*
* @param width
* @param height
* @param config
* @param retryCount
* @return
*/
public static Bitmap createBitmapSafely(int width, int height, Bitmap.Config config, int retryCount) {
try {
return Bitmap.createBitmap(width, height, config);
} catch (OutOfMemoryError e) {
e.printStackTrace();
if (retryCount > 0) {
System.gc();
return createBitmapSafely(width, height, config, retryCount - 1);
}
return null;
}
}
}
|
看完工具类,回过头来看爆照动画类 ExplosionAnimator :
1
2
3
4
5
6
7
8
9
10
11
12
13
14
15
16
17
18
19
20
21
22
23
24
25
26
27
28
29
30
31
32
33
34
35
36
37
38
39
40
41
42
43
44
45
46
47
48
49
50
51
52
53
54
55
56
57
58
59
60
61
62
63
64
65
66
67
68
69
70
71
72
73
74
75
76
77
78
79
80
81
82
83
84
85
86
87
88
89
90
| public class ExplosionAnimator extends ValueAnimator {
static long DEFAULT_DURATION = 0x400;
private static final Interpolator DEFAULT_INTERPOLATOR = new AccelerateInterpolator(0.6f);
private static final float END_VALUE = 1.4f;
private static final float X = Utils.dp2Px(5);
private static final float Y = Utils.dp2Px(20);
private static final float V = Utils.dp2Px(2);
private static final float W = Utils.dp2Px(1);
private Paint mPaint;
private Particle[] mParticles;
private Rect mBound;
private View mContainer;
public ExplosionAnimator(View container, Bitmap bitmap, Rect bound) {
mPaint = new Paint();
mBound = new Rect(bound);
int partLen = 15;
mParticles = new Particle[partLen * partLen];
Random random = new Random(System.currentTimeMillis());
int w = bitmap.getWidth() / (partLen + 2);
int h = bitmap.getHeight() / (partLen + 2);
for (int i = 0; i < partLen; i++) {
for (int j = 0; j < partLen; j++) {
mParticles[(i * partLen) + j] = generateParticle(bitmap.getPixel((j + 1) * w, (i + 1) * h), random);
}
}
mContainer = container;
setFloatValues(0f, END_VALUE);
setInterpolator(DEFAULT_INTERPOLATOR);
setDuration(DEFAULT_DURATION);
}
private Particle generateParticle(int color, Random random) {
Particle particle = new Particle();
particle.color = color;
particle.radius = V;
if (random.nextFloat() < 0.2f) {
particle.baseRadius = V + ((X - V) * random.nextFloat());
} else {
particle.baseRadius = W + ((V - W) * random.nextFloat());
}
float nextFloat = random.nextFloat();
particle.top = mBound.height() * ((0.18f * random.nextFloat()) + 0.2f);
particle.top = nextFloat < 0.2f ? particle.top : particle.top + ((particle.top * 0.2f) * random.nextFloat());
particle.bottom = (mBound.height() * (random.nextFloat() - 0.5f)) * 1.8f;
float f = nextFloat < 0.2f ? particle.bottom : nextFloat < 0.8f ? particle.bottom * 0.6f : particle.bottom * 0.3f;
particle.bottom = f;
particle.mag = 4.0f * particle.top / particle.bottom;
particle.neg = (-particle.mag) / particle.bottom;
f = mBound.centerX() + (Y * (random.nextFloat() - 0.5f));
particle.baseCx = f;
particle.cx = f;
f = mBound.centerY() + (Y * (random.nextFloat() - 0.5f));
particle.baseCy = f;
particle.cy = f;
particle.life = END_VALUE / 10 * random.nextFloat();
particle.overflow = 0.4f * random.nextFloat();
particle.alpha = 1f;
return particle;
}
}
|
- 在
nextFloat 的值小于 0.2 时,top 范围在 mBound.height()*(0~0.38) ,bottom 范围在 mBound.height()*(-0.9~0.9) ;
- 在
nextFloat 的值大于等于 0.2,小于 0.8 时,top 范围在 mBound.height()*(0~0.456) ,bottom 范围在 mBound.height()*(-0.54~0.54) ;
- 在
nextFloat 的值大于等于 0.8 时,top 范围在 mBound.height()*(0~0.456) ,bottom 范围在 mBound.height()*(-0.27~0.27)
particle.baseCx 和 particle.baseCy 是爆炸一开始的颗粒的坐标,都在要爆炸 View 中心的偏移 10dp 的位置。
当爆炸开始时,调用了 start() 方法:
1
2
3
4
5
6
7
| public class ExplosionAnimator extends ValueAnimator {
@Override
public void start() {
super.start();
mContainer.invalidate(mBound);
}
}
|
mContainer 就是 ExplosionField ,那么 onDraw(Canvas) 方法将会被调用:
1
2
3
4
5
6
7
8
9
| public class ExplosionField extends View {
@Override
protected void onDraw(Canvas canvas) {
super.onDraw(canvas);
for (ExplosionAnimator explosion : mExplosions) {
explosion.draw(canvas);
}
}
}
|
再进到 ExplosionAnimator 的 draw(Canvas) 方法中:
1
2
3
4
5
6
7
8
9
10
11
12
13
14
15
16
17
18
19
20
21
22
| public class ExplosionAnimator extends ValueAnimator {
public boolean draw(Canvas canvas) {
if (!isStarted()) {
return false;
}
for (Particle particle : mParticles) {
particle.advance((float) getAnimatedValue());
if (particle.alpha > 0f) {
mPaint.setColor(particle.color);
mPaint.setAlpha((int) (Color.alpha(particle.color) * particle.alpha));
canvas.drawCircle(particle.cx, particle.cy, particle.radius, mPaint);
}
}
mContainer.invalidate();
}
}
|
这里主要动画应该就是在 Particle.advance(float) 方法里面:
1
2
3
4
5
6
7
8
9
10
11
12
13
14
15
16
17
18
19
20
21
22
23
24
25
26
27
28
29
30
31
32
33
34
35
36
37
38
39
40
41
42
43
44
45
46
47
48
49
| public class ExplosionAnimator extends ValueAnimator {
private class Particle {
float alpha;
int color;
float cx;
float cy;
float radius;
float baseCx;
float baseCy;
float baseRadius;
float top;
float bottom;
float mag;
float neg;
float life;
float overflow;
public void advance(float factor) {
float f = 0f;
float normalization = factor / END_VALUE;
if (normalization < life || normalization > 1f - overflow) {
alpha = 0f;
return;
}
normalization = (normalization - life) / (1f - life - overflow);
float f2 = normalization * END_VALUE;
if (normalization >= 0.7f) {
f = (normalization - 0.7f) / 0.3f;
}
alpha = 1f - f;
f = bottom * f2;
cx = baseCx + f;
cy = (float) (baseCy - this.neg * Math.pow(f, 2.0)) - f * mag;
radius = V + (baseRadius - V) * f2;
}
}
}
|
- 在第一个 if 判断中,
normalization < life 说明一开始的时候是不显示的,所以这个地方导致了有些颗粒先出来有些颗粒后出来;
- 同时在第一个 if 判断中,
normalization > 1f - overflow 说明到后面该颗粒就不显示了;
cx 在不断的加上 f ,而 f 的值是由 bottom * f2 儿来,bottom 可能为正数可能为负数,这就导致了有得颗粒向左有的颗粒向右cy 的变化是一个函数性的变换,先变大再不断的变小;//TODO 待更新分析radius 半径的变化是逐渐靠近 baseRadius;
总结
爆炸动画
爆炸动画 ExplosionAnimator继承于 ValueAnimator ,在动画开始的时候去刷新 ExplosionField 的绘制,也就是调用了 ExplosionField.onDraw(Canvas) ,在 onDraw(Canvas) 中又调用了 ExplosionAnimator.draw(canvas) ,而在 ExplosionAnimator.draw(canvas) 中进行爆炸颗粒 Particle 的变换,比如位置、颜色、大小等,然后调用 ExplosionField.invalidate() 触发了 ExplosionAnimator.draw(canvas) ,就这样不停的来回调用,直到动画结束。
颗粒
代码一个有 15*15 个颗粒,但是每个颗粒的高度和宽度都是以 17*17 个计算得来的,实际上在处理的时候是放弃掉了周围一圈的颗粒。下图中的实心部分是没有算进去的颗粒。
1
2
3
4
5
6
7
8
9
10
11
12
13
14
15
16
17
| ● ● ● ● ● ● ● ● ● ● ● ● ● ● ● ● ●
● ○ ○ ○ ○ ○ ○ ○ ○ ○ ○ ○ ○ ○ ○ ○ ●
● ○ ○ ○ ○ ○ ○ ○ ○ ○ ○ ○ ○ ○ ○ ○ ●
● ○ ○ ○ ○ ○ ○ ○ ○ ○ ○ ○ ○ ○ ○ ○ ●
● ○ ○ ○ ○ ○ ○ ○ ○ ○ ○ ○ ○ ○ ○ ○ ●
● ○ ○ ○ ○ ○ ○ ○ ○ ○ ○ ○ ○ ○ ○ ○ ●
● ○ ○ ○ ○ ○ ○ ○ ○ ○ ○ ○ ○ ○ ○ ○ ●
● ○ ○ ○ ○ ○ ○ ○ ○ ○ ○ ○ ○ ○ ○ ○ ●
● ○ ○ ○ ○ ○ ○ ○ ○ ○ ○ ○ ○ ○ ○ ○ ●
● ○ ○ ○ ○ ○ ○ ○ ○ ○ ○ ○ ○ ○ ○ ○ ●
● ○ ○ ○ ○ ○ ○ ○ ○ ○ ○ ○ ○ ○ ○ ○ ●
● ○ ○ ○ ○ ○ ○ ○ ○ ○ ○ ○ ○ ○ ○ ○ ●
● ○ ○ ○ ○ ○ ○ ○ ○ ○ ○ ○ ○ ○ ○ ○ ●
● ○ ○ ○ ○ ○ ○ ○ ○ ○ ○ ○ ○ ○ ○ ○ ●
● ○ ○ ○ ○ ○ ○ ○ ○ ○ ○ ○ ○ ○ ○ ○ ●
● ○ ○ ○ ○ ○ ○ ○ ○ ○ ○ ○ ○ ○ ○ ○ ●
● ● ● ● ● ● ● ● ● ● ● ● ● ● ● ● ●
|
每个颗粒有一个 life 和 overflow 变量,当动画的比例值没有超过 life 则不显示出来,若超过了 overflow 也不显示出来,这里就导致了每个颗粒出现时间点不一样。其次,开始的时候每个颗粒的启始位置都是在中心位置的上下左右偏移 10dp 的范围内。
